The new DxO Photolab 4 application to the rescue to “denoise” old photographs of interior spaces by the architect Le Corbusier taken in in Paris and Firminy in France.
Faced with the promise of “revolution” made by this new version of the French DxO Photolab RAW photo development software to denoise, with the help of “artificial intelligence” our images, i wanted to test this application on very “noisy” old files.
So I went “fishing out” some old RAW that infested the limbo of my photo library to offer you this guided tour.
Denoising to the RAW-scue
The RAW, what is it?
RAW is the name given to the original file produced by the sensor of our professional cameras.
RAW files, which are not directly usable as jpg images, must be processed and developed using specialized applications.
The amount of information contained in these files is very often essential for a professional photographer because it allows to work in the maximum spectrum of colors and light of the image, and especially in the extremes, such as high and low lights.
A point on noise…
Digital sensors, even though they have made great progress in recent years, tend to generate noise, like clouds of dots of different colors, in low light that they often find difficult to analyze.
When brightening an underexposed photo or one with very dark areas, a lot of this unsightly noise can appear.
Grain to grind
The denoising of a digital image consists in removing or attenuating these colored pixels while trying to preserve the sharpness of the contours.
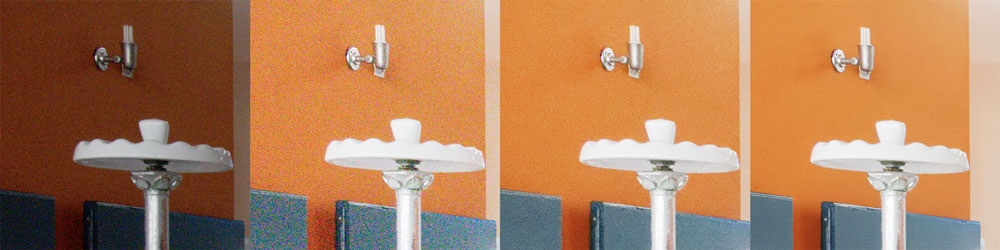
Regarding the images reprocessed in this article with DxO Photolab 4, the original files were often dark and very noisy as you can see on these samples.
The images on the right show different levels of denoising once the image has been brightened.
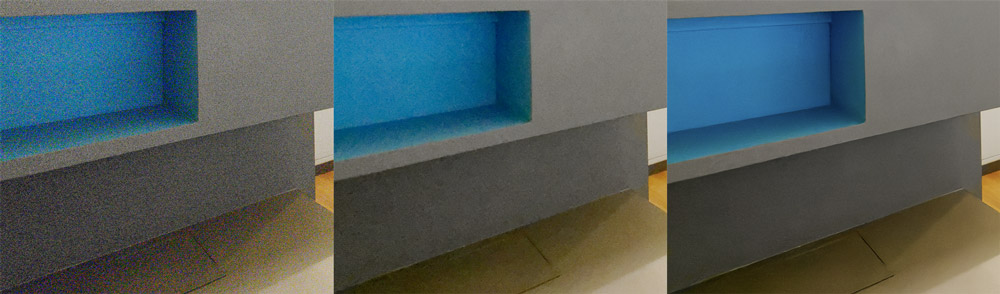
It can be seen from these examples that a relatively good final sharpness is maintained with virtually uniform color patches thanks to Photolab’s ultimate denoising solution, called DeepPRIME.
De-RAW-tization of an apartment and a school designed by Le Corbusier
Back to the past
In the early 2000s, the Cité de l’architecture & du patrimoine initiated the “Le Corbusier project” which consisted in recreating on a scale of 1:1 an E2 type flat of the Cité radieuse de Marseille in the museum’s architectural gallery.
Going to the Palais de Tokyo in Paris to visit an exhibition, I discovered the museum’s permanent collection, related to architecture, and more particularly this reconstructed living space created by Le Corbusier.
The reconstructed flat was very similar to the one I had had the opportunity to visit in another housing unit in Firminy in the Loire region of France.
At the time, I was making some very underexposed freehand photographs, in order to keep the highlights, but they were difficult to recover until I managed to remove them with this new version of DxO Photolab.
The appartment Le Corbusier without noise
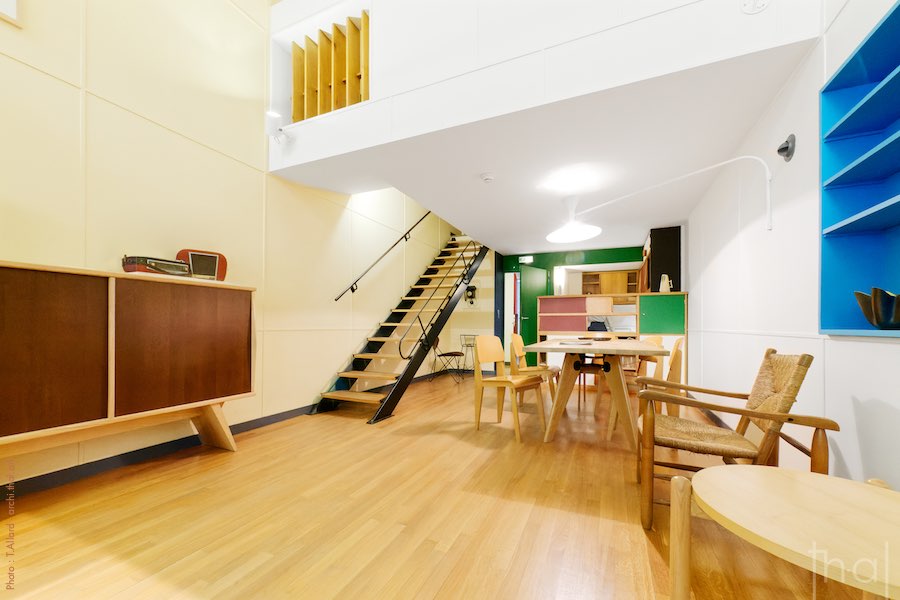
The duplex flat is restored in its entirety with its furniture and lounge/dining room/kitchen on the first level.
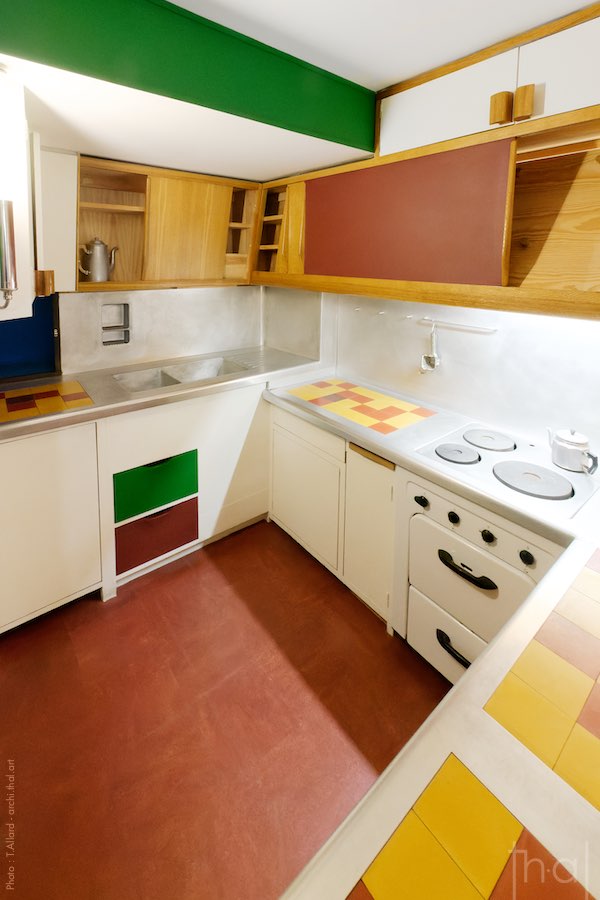
This is not a children’s dinette but a real equipped kitchen, very cramped but quite avant-garde for its time.
Upstairs there are three bedrooms and a small bathroom.
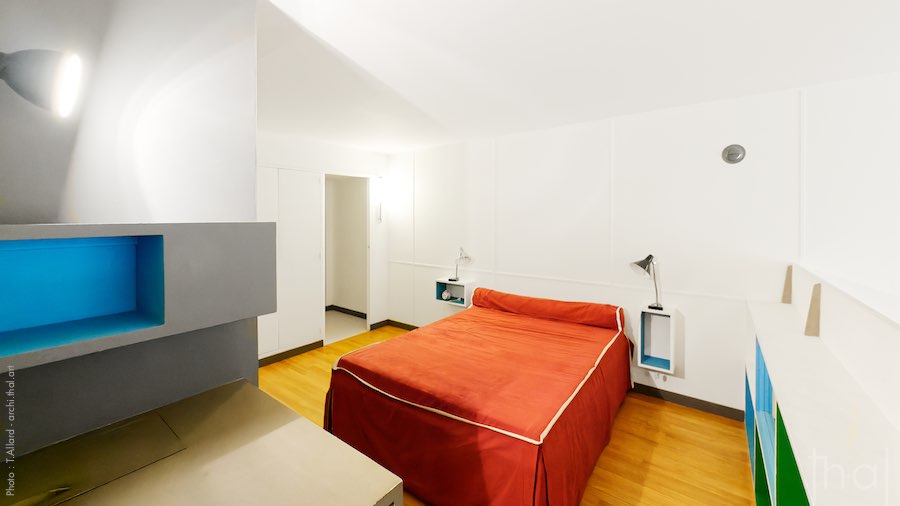
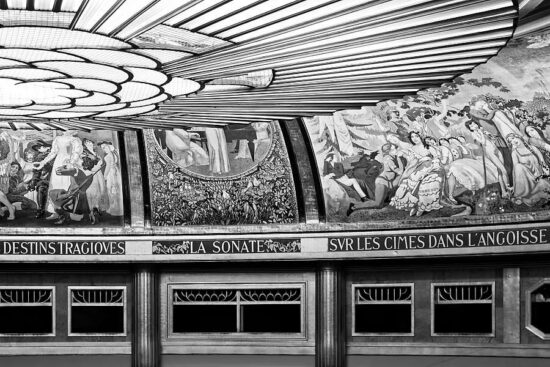
The master bedroom with a desk in the foreground and its small storage niches is on a mezzanine floor open onto the dining room.

The two children’s bedrooms upstairs seen from the outside are narrow and full-length, each with a different colour code.
The central wooden upright corresponds to the partition that separates them!
Mini modulor, photographer at school
A few years ago, some very dear friends had offered me a visit to Firminy in the Loire to discover Le Corbusier’s housing unit.
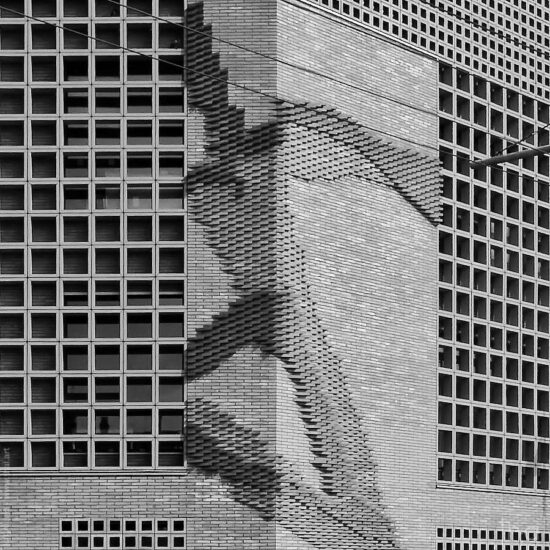
On the top floor of the building bar, built several years after the architect’s death, is the former kindergarten, which was closed in 1998 after 30 years of use. The roof terrace serves as an outdoor courtyard, as in the Cité Radieuse in Marseille.
At the time, it made perfect sense for me to stand at the height of a child to photograph these classrooms.
Here is an excerpt from the photo report made by a half modulor measuring approximately 91.5 cm high…


View at child’s height of a Le Corbusier kindergarten classroom.

Entrance hall of the school with colourful openings that brighten up the space a bit and with the original circular washbasin which seemed a bit high to me, seen from the height of a child!
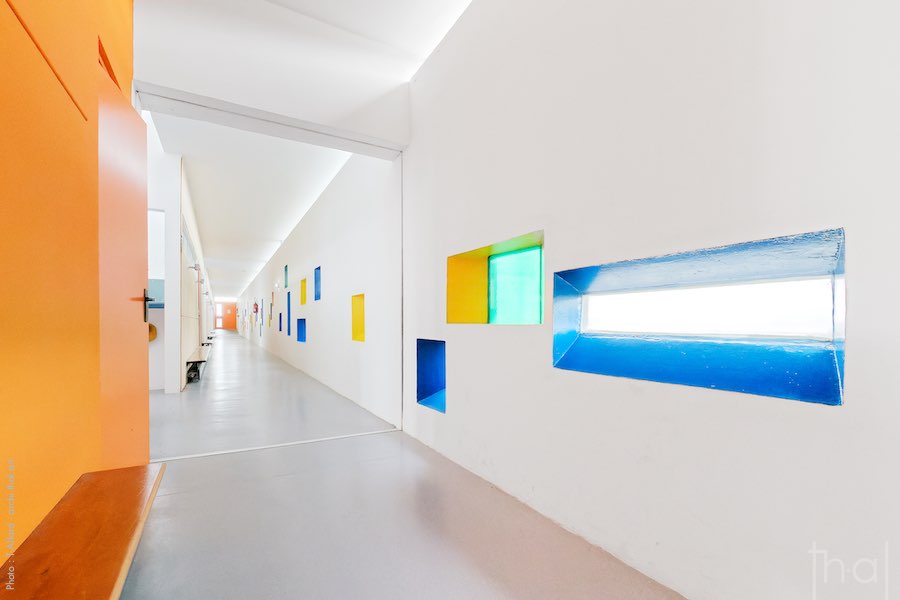
View of the corridor running along the different rooms of the school with a multitude of small benches.
You may be interested in other reports on Le Corbusier architect:

My point of view on DxO Photolab 4
Positive points
The test of the DxO Photolab 4 for image noise reduction proved to be quite conclusive for me and its complete handling, in less than a weekend, was quick.
So I bought it to use it mainly for its advanced DeepPRIME denoising function on images taken in difficult conditions and conversely for the processing of images made in photo studios that require little retouching.
The configurable export formats, the creation of personalised palettes and the implementation, in this version, of watermarks seem to me to be essential to bring this application up to the level of some of its competitors.
The profusion of optical-casing profiles and lens corrections clearly sets DxO Photolab above almost all its competitors in this field. I enjoyed finding relatively new lens correction profiles for my Nikon Z.
Negative points
Using a much more complete application like Darktable, I’m missing some features such as, for example, better management – customisation of keyboard shortcuts so that I can directly activate all the settings and not just a small part of the palettes.
It is frustrating and time consuming to have to use the mouse so much on our large screens to activate or deactivate commonly used functions.
I am divided on the layer management system which I find quite ingenious but which presents too quickly limits because of the impossibility to edit shapes on masks already created.
The editing functions also clearly lack the possibility to edit shapes and to be able to draw straight segments.
I imagine that all the shapes created by the software are vectorial and are possibly Bézier curves that should be made editable in a future version.
As far as the Photo Library cataloguer is concerned, it is reduced to its simplest form compared to Darktable or other competing applications.
The absence of a collection of colour tags that allow you to mark your images at different stages is a major obstacle for me.
The management of keywords is still a little too embryonic and is not manageable in a grouped way at the level of the cataloguer.
As far as the adjustment modules within the panels do not differ much from each other, a more visible separation between these modules or at least between the title of the modules and their settings is clearly missing.
The image filtering offers 25 different criteria, which can be useful, but to be able to use only one display criterion, you have to open the menu 24 times in a row to be able to do this, it’s completely crazy!
A panel dedicated to filters, rather than a drop-down menu, could allow us to choose our criteria more easily, or pressing a key could allow us to reverse the sort selection so that we can start from one filter and then add others.
Under exposure, an explanation would be better
So as not to say goodbye to highlights when lighting differences are very strong, and unless you have a photo stand that allows you to make identical shots with multiple exposures, the choice to underexpose may be necessary when shooting professionally (for non-artistic purposes).
Then, when processing the RAW file, simply correct the low and mid-lights while trying to preserve the highlights.
Please respect the copyright and do not use any content from this article without first requesting it.
If you notice any errors or inaccuracies in this article, please let me know!